Are you ready to transform your plain wall into a stunning masterpiece? Painting a gradient on your wall is a simple way to add depth, color, and style to any room.
Whether you want a soft fade or a bold transition, this technique can make your space feel fresh and unique. In this guide, you’ll discover easy steps and expert tips that anyone can follow, even if you’ve never picked up a paintbrush before.
Keep reading, and by the end, you’ll have the confidence to create a beautiful gradient wall that truly stands out.
Choosing The Right Tools
Painting a gradient on a wall needs more than just paint. Picking the right tools makes the job easier and the result better.
Good tools help blend colors smoothly. They also save time and reduce mistakes.
Essential Painting Supplies
Use quality brushes and rollers for smooth application. You need different sizes for edges and large areas.
- Angled brushes for corners and edges
- Synthetic brushes for water-based paints
- Foam rollers for even coverage
- Paint trays to hold and mix paint
- Painter’s tape to protect edges
- Drop cloths to keep floors clean
Selecting The Perfect Paint Colors
Pick colors that blend well for a soft gradient effect. Test colors on the wall before starting.
| Color Type | Best Use |
| Light Shades | For bright, airy gradients |
| Dark Shades | To add depth and contrast |
| Mid Tones | For smooth transitions |
Preparing The Wall
Painting a gradient on a wall starts with good preparation. A clean and smooth wall helps paint stick better.
Proper preparation makes the gradient look even and lasts longer.
Cleaning And Repairing
First, clean the wall to remove dust, dirt, and grease. Use a mild soap and water solution.
Check the wall for holes, cracks, or bumps. Fix these with spackle or wall filler.
- Wipe the wall with a damp cloth
- Scrape off loose paint or peeling spots
- Fill holes and cracks with spackle
- Sand the repaired areas smooth
- Let the wall dry completely
Applying Primer
Apply primer to the clean and repaired wall. Primer helps paint stick and shows the true color.
Use a roller or brush to apply an even coat. Let the primer dry fully before painting the gradient.
- Choose a primer suitable for your wall type
- Apply primer evenly with roller or brush
- Cover the entire surface to seal it
- Allow primer to dry as per instructions
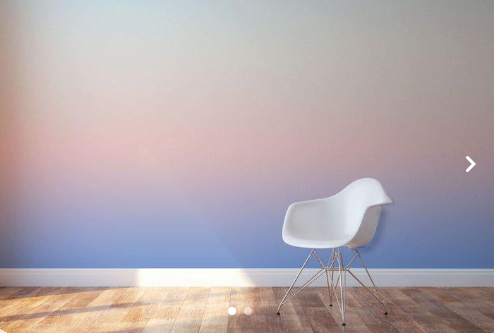
Planning The Gradient Design
Painting a gradient on a wall creates a smooth color change that looks beautiful. Planning the design helps you get the best results.
Good planning saves time and avoids mistakes. It makes the painting process easier and more fun.
Deciding On The Gradient Direction
Choose the direction where the gradient will flow. It can go up and down, side to side, or diagonally.
The direction affects how the room feels. Vertical gradients make walls look taller. Horizontal gradients make rooms feel wider.
- Vertical: top to bottom or bottom to top
- Horizontal: left to right or right to left
- Diagonal: corner to corner
Mapping Out Sections
Divide the wall into sections before painting. This helps you blend colors smoothly in each part.
Use light pencil marks or painter’s tape to mark sections. Plan where each color will start and end.
- Mark the start and end points of the gradient
- Divide the wall into equal parts for color blending
- Use tape to separate colors if needed
- Plan for smooth transitions between sections
Credit: www.jswpaints.in
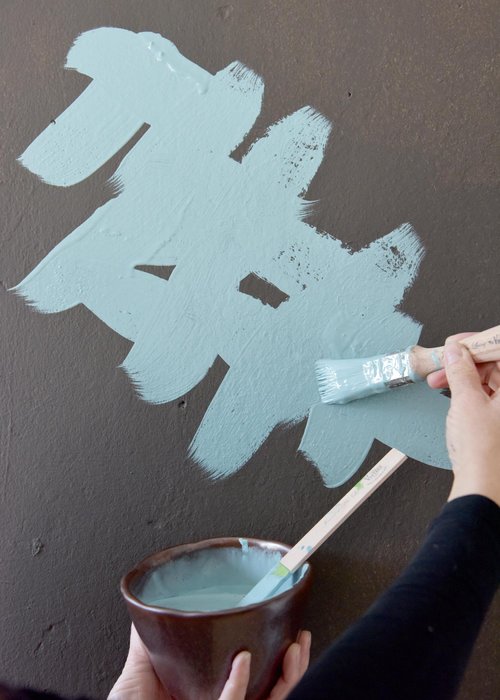
Mixing Paint For Gradient
Painting a gradient on a wall needs careful paint mixing. The goal is to create smooth color changes from one shade to another.
Mixing the right colors and amounts helps achieve a natural flow in the gradient effect.
Creating Transition Shades
Transition shades are the colors between your main gradient colors. You make these by mixing small amounts of each base paint.
- Start with your two main colors on a palette.
- Mix a small amount of the first color with the second color.
- Adjust the ratio to get a middle shade between the two.
- Make several mixes with gradually changing ratios.
- Label each mix to keep track of the order.
Maintaining Consistency
Consistency in paint mixing ensures the gradient looks smooth and even. Use the same base paint type and mixing method.
| Tip | Why it Matters |
| Use a clean mixing container | Prevents color contamination |
| Mix each shade thoroughly | Ensures even color distribution |
| Keep a mixing ratio log | Helps recreate exact shades later |
| Use quality brushes or tools | Improves blending on the wall |
Applying The Base Coat
Painting a gradient on a wall starts with a strong base coat. This layer creates a smooth surface for the colors.
The base coat helps the paint stick well and shows the true colors of your gradient.
Ensuring Even Coverage
Apply the base coat evenly to avoid streaks or patches. Use a roller for large areas and a brush for edges.
Work in small sections and spread the paint smoothly. Avoid pressing too hard with the roller.
- Use long, even strokes with the roller
- Overlap each stroke slightly for full coverage
- Check for thin spots and add paint if needed
- Keep a wet edge to prevent lines
Allowing Proper Drying Time
Let the base coat dry fully before painting the gradient. Wet paint can mix and ruin the effect.
Drying times depend on paint type and room temperature. Check the paint can for recommended times.
- Wait at least 4 hours for latex paint
- Avoid high humidity or cold rooms
- Use a fan to speed drying if needed
- Touch the wall gently to test dryness

Credit: angelusdirect.com
Blending The Gradient
Blending a gradient on a wall creates a smooth color shift. It adds depth and interest to any room.
Good blending avoids harsh lines and makes colors flow naturally from one shade to another.
Using The Wet-on-wet Technique
The wet-on-wet technique helps blend colors while the paint is still wet. This method keeps edges soft.
- Apply the first color on the wall in a large section.
- While it is wet, add the second color next to the first.
- Use a clean, dry brush or sponge to gently mix where the colors meet.
- Work quickly to avoid the paint drying before blending.
- Repeat the process for all colors in your gradient.
Achieving Seamless Transitions
Seamless transitions make the gradient look natural and smooth. Small tools and careful strokes help.
| Tool | Purpose |
|---|---|
| Flat Brush | Blends large areas evenly |
| Feather Brush | Softens edges for smooth transition |
| Sponge | Adds texture and helps mix colors |
| Dry Cloth | Removes excess paint and smooths surface |
Finishing Touches
Painting a gradient on a wall looks great, but the final steps make it perfect. These finishing touches give your wall a smooth, clean look.
Pay close attention to details like edges and sealing. This will keep your paint job lasting longer and looking fresh.
Touching Up Edges
Edges often need extra care to look neat. Use a small brush to carefully fix any uneven lines or paint spills.
Work slowly and blend the colors if needed. This helps keep the smooth gradient effect consistent near corners and borders.
- Use painter’s tape to protect areas before touching up
- Lightly feather the paint to blend edges
- Check edges in good light to spot mistakes
- Let touch-ups dry fully before adding more paint
Sealing The Paint
Sealing protects your gradient from dirt and damage. Choose a clear sealer that works with your paint type.
Apply the sealer evenly with a roller or brush. This keeps the colors bright and prevents peeling over time.
- Pick a matte or satin finish to keep the wall smooth
- Apply thin, even coats to avoid drips
- Allow each coat to dry before applying the next
- Ventilate the room well while sealing
Troubleshooting Common Issues
Painting a gradient on a wall can be tricky. Sometimes, the colors do not blend smoothly. You might also make mistakes with the colors.
Knowing how to fix these problems helps you get better results. Here are tips to solve common gradient painting issues.
Dealing With Uneven Blends
Uneven blends happen when the colors do not mix smoothly. This can make the gradient look patchy or striped.
To fix uneven blends, work while the paint is still wet. Use a clean, dry brush to gently mix the edges.
- Work quickly before the paint dries
- Use soft, horizontal strokes to blend
- Apply thin layers of paint for better control
- Keep a wet edge to avoid hard lines
- Practice blending on a test surface first
Fixing Color Mistakes
Color mistakes can happen if the paint is too dark or light. Sometimes, the colors look different than expected.
You can fix mistakes by letting the paint dry and then repainting the area. Use a matching base color first before adding the gradient again.
- Wait for the paint to dry completely
- Cover mistakes with a base coat
- Reapply the gradient colors carefully
- Use painter’s tape to protect other areas
- Test color mixes on paper before painting
Maintaining The Painted Wall
After painting a gradient on your wall, it is important to care for it properly. Good maintenance keeps the colors bright and fresh.
Proper cleaning and care prevent damage and help the paint last longer. This guide shares simple tips to maintain your painted wall.
Cleaning And Care Tips
Dust your gradient wall often using a soft cloth or a feather duster. This stops dirt from building up and dulling the paint.
For stains or marks, use a mild soap mixed with water. Gently wipe the wall with a soft sponge. Avoid scrubbing hard to protect the paint.
- Use a soft cloth or feather duster for dusting
- Clean stains with mild soap and water
- Wipe gently without scrubbing
- Do not use harsh chemicals or abrasive tools
Ensuring Longevity
Keep your painted wall safe from moisture and direct sunlight. Both can cause paint to peel or fade faster.
Use a clear, matte sealant on your gradient wall. This adds a protective layer without changing the colors.
- Protect the wall from water and humidity
- Limit exposure to direct sunlight
- Apply a clear sealant for extra protection
- Fix chips or cracks quickly to avoid damage
Credit: en.jeannedarcliving.dk
Frequently Asked Questions
How Do You Start Painting A Gradient On A Wall?
Begin by choosing your colors and preparing the wall surface. Use painter’s tape to mark edges. Apply the base color first, then blend the next shades while the paint is wet for a smooth gradient effect.
What Tools Are Best For Painting Wall Gradients?
Use high-quality brushes, foam rollers, and sponges for smooth blending. A paint tray and painter’s tape help control paint application. Soft brushes help create seamless transitions between colors.
How Long Does It Take To Paint A Gradient Wall?
It usually takes 3 to 6 hours depending on wall size and paint drying times. Preparation and blending require patience for the best smooth gradient finish.
Can Beginners Easily Paint A Gradient Wall?
Yes, beginners can paint gradients with practice and proper tools. Start with simple color transitions and use blending techniques. Patience and light brush strokes improve results.
Conclusion
Painting a gradient on a wall adds style and depth to any room. Start with good prep work and choose colors that blend well. Use smooth brush or roller strokes to create the fade effect. Take your time and work in small sections for best results.
Clean tools after each step to keep colors fresh. Enjoy the process and watch your wall transform beautifully. This simple technique can brighten up your space with color and creativity. Give it a try and see how a gradient changes your room’s look.