
Have you ever wanted to create a warm, cozy glow in your home without relying on electricity? Making your own oil lamp is easier than you think, and it’s a fun way to add charm and light to any room.
In this guide, you’ll discover simple steps to craft a beautiful oil lamp using everyday items. Whether you want to save money, prepare for emergencies, or just enjoy a hands-on project, this article will show you exactly how to do it.
Keep reading, and by the end, you’ll have your very own oil lamp ready to brighten your space.
Materials Needed
Making an oil lamp at home is simple and requires only a few common materials. You can find most of these items around your house.
Using household items makes this project easy and safe to do. Gather everything before you start to save time.
Household Items
These items form the base of your oil lamp. They are easy to find and use.
- Small glass jar or empty tin can
- Cooking oil (vegetable or olive oil works well)
- Cotton string or thick cotton thread for the wick
- Scissors to cut the wick
- Water (optional, to stabilize the oil)
Optional Add-ons
These items are not required but can help improve your oil lamp’s performance and safety.
| Item | Purpose |
| Metal lid with a hole | Keeps the wick steady and controls flame size |
| Essential oils | Add fragrance when burning |
| Aluminum foil | Used to cover the jar for safety |
| Tweezers | Helps place and adjust the wick |

Credit: www.youtube.com
Choosing The Right Container
Making an oil lamp at home requires a safe container. The container holds the oil and wick. It must resist heat and avoid spills.
Selecting the right container keeps your lamp stable and secure. This helps prevent accidents and ensures your lamp works well.
Heat-resistant Options
Choose containers that handle heat without cracking or melting. Glass jars, metal tins, and ceramic bowls work well. Avoid plastic containers. They can melt or catch fire.
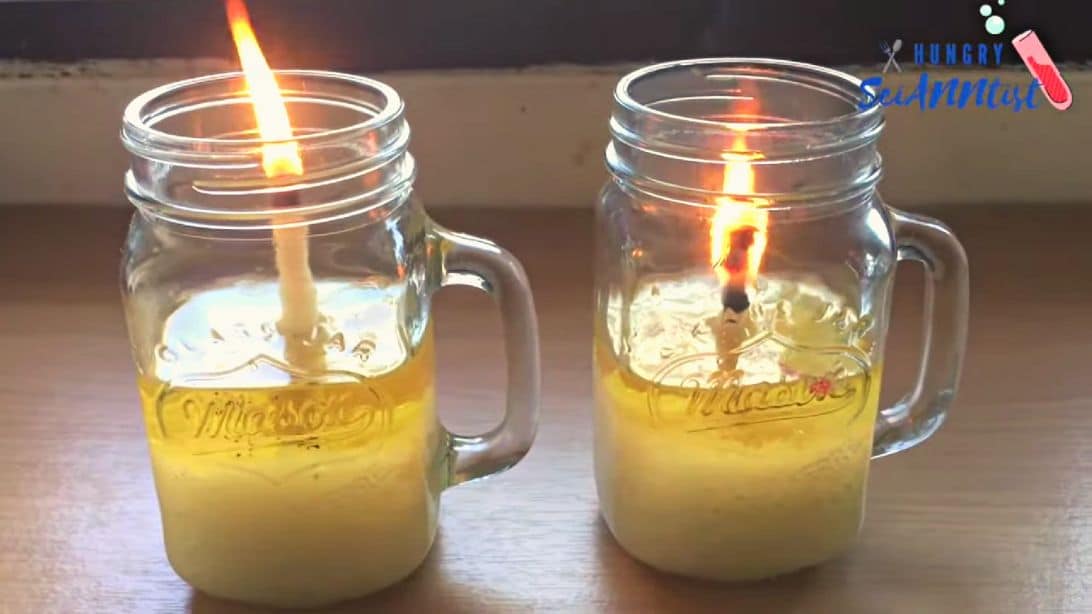
- Glass jars like mason jars
- Metal containers such as small tins
- Ceramic or clay pots
- Stone holders
Size Considerations
| Container Size | Use Case | Notes |
| Small (up to 4 inches) | Table lamps | Easy to move, less oil needed |
| Medium (4 to 8 inches) | Room lighting | Good balance of oil and size |
| Large (above 8 inches) | Outdoor use | More stable but heavier |
Pick a size that fits your space. Small containers suit desks. Large ones work outside or in big rooms. Make sure the container is stable and not easy to tip over.
Selecting The Wick
The wick is a key part of your oil lamp. It draws oil up to keep the flame burning.
Choosing the right wick affects how well your lamp works and how clean it burns.
Cotton Vs. Alternative Materials
Cotton is the most common wick material. It burns evenly and is easy to find. Some alternatives include hemp, fiberglass, and synthetic fibers. Each material changes how the wick burns and how much smoke it makes.
- Cotton:Absorbs oil well and burns steadily.
- Hemp:Strong and eco-friendly but can burn faster.
- Fiberglass:Lasts longer but may produce more smoke.
- Synthetic fibers:Durable but might affect oil taste.
Length And Thickness
The wick’s size matters. A wick that is too short will not reach the oil properly. One too long can cause a large, smoky flame.
| Wick Thickness | Flame Size | Oil Consumption |
| Thin | Small | Low |
| Medium | Medium | Moderate |
| Thick | Large | High |

Credit: food52.com
Preparing The Oil
Making an oil lamp at home needs the right oil. The type of oil affects how well the lamp burns. You should pick oil that burns clean and steady.
Before filling your lamp, prepare the oil carefully. This will help the lamp work longer and safer. Let’s look at some common oils you can use.
Types Of Oils
Different oils burn differently. Choose an oil based on availability and burn quality. Some oils produce less smoke and smell better.
- Vegetable oil: Easy to find and burns slowly.
- Olive oil: Burns clean with little smoke.
- Canola oil: Affordable and burns well.
- Coconut oil: Has a mild scent and burns steady.
- Fish oil: Burns bright but may have a strong smell.
Scented Variations
You can add scents to your oil lamp for a pleasant aroma. Use natural ingredients to avoid harmful fumes.
| Ingredient | Effect | Usage Tips |
| Essential oils | Adds fragrance | Add a few drops to the oil |
| Herbs (lavender, rosemary) | Natural scent | Infuse in oil before use |
| Citrus peels | Fresh smell | Dry and soak in oil |
| Vanilla extract | Sweet aroma | Mix lightly with oil |
Assembling The Lamp
Making an oil lamp at home is simple and fun. The key part is putting the lamp together carefully.
This section explains how to insert the wick and fill the container safely.
Inserting The Wick
Choose a cotton wick that fits your container’s opening. The wick draws oil to keep the lamp burning.
Place one end of the wick inside the container. Let the other end stick out enough to light it easily.
- Trim the wick to the right length
- Insert wick through the container opening
- Make sure the wick is secure and not loose
- Leave about one inch of wick outside
Filling The Container
Use clean, safe lamp oil to fill the container. Pour slowly to avoid spills or overflow.
Fill the container until the wick is soaked but not flooded. This helps the lamp burn well without smoke.
- Use a funnel to pour oil neatly
- Fill to about three-quarters full
- Check that the wick is wet with oil
- Wipe any spilled oil on the container
Safety Tips
Making an oil lamp at home can be fun and useful. You must follow safety tips to avoid accidents. Keep fire safety in mind while using the lamp.
Always watch your oil lamp carefully. A small mistake can cause big problems. Learn how to place and supervise your lamp safely. Also, know how to put out the flame properly.
Placement And Supervision
Place your oil lamp on a flat, steady surface. Keep it away from curtains, paper, and other things that catch fire easily. Never leave the lamp alone while it is burning.
- Use a heat-resistant base for the lamp
- Keep the lamp away from children and pets
- Do not place the lamp near open windows
- Check the lamp for oil spills before lighting
- Always stay in the room while the lamp is lit
Extinguishing The Flame
Put out the flame safely to avoid accidents. Never blow directly on the flame. Use safe methods to stop the fire without spreading it.
| Method | How to Do It |
| Snuffer | Cover the flame gently until it goes out |
| Metal Lid | Place a metal lid over the lamp to cut oxygen |
| Wet Cloth | Use a damp cloth to cover the flame carefully |
| Do Not Blow | Avoid blowing to prevent oil splashing |
Decorative Ideas
Making an oil lamp at home lets you add a personal touch to your space. You can decorate it in many creative ways. These ideas help your lamp look beautiful and unique.
Using colors and themes can make your oil lamp a perfect decor piece. They match your style or the season.
Personalizing With Colors
Choosing colors for your oil lamp adds charm and style. Pick colors that fit your room or mood. You can paint the lamp’s base or add colored oils.
- Use glass paint to color the lamp’s body
- Add food coloring to the oil for a soft glow
- Wrap colored ribbons or yarn around the lamp
- Attach small colorful beads or stones on the lamp
- Mix glitter with the oil for sparkle
Seasonal Themes
Decorate your oil lamp to fit holidays or seasons. This makes your lamp festive and fun. Change decorations to match winter, spring, summer, or fall.
| Season | Decoration Ideas |
| Spring | Attach small flowers and pastel ribbons |
| Summer | Use bright colors and seashells |
| Fall | Add orange leaves and tiny pine cones |
| Winter | Wrap with silver thread and add snowflake charms |
| Holidays | Use themed stickers or paint (e.g., pumpkins, stars) |
Troubleshooting Common Issues
Making an oil lamp at home is simple, but some problems can occur. These issues affect how well your lamp works and how safe it is.
This guide helps you fix common problems like flickering flames and bad smells. Follow these tips to enjoy your oil lamp safely.
Flickering Flames
Flickering flames happen when the flame does not burn steadily. This can make the light weak and unsafe.
Common causes include wind, poor wick quality, or wrong oil type. Check these to fix the flicker.
- Keep the lamp away from drafts and wind.
- Use a wick made for oil lamps, not cloth scraps.
- Choose clean, clear lamp oil with low impurities.
- Trim the wick to about ¼ inch for better burning.
- Make sure the wick is fully soaked in oil before lighting.
Unpleasant Odors
Bad smells come from burning the wrong oil or dirty wicks. These odors can make the room uncomfortable.
Use fresh oil and clean wicks to avoid smells. Old or used oil often causes strong odors.
- Replace oil if it smells sour or rancid.
- Clean or change the wick regularly to stop buildup.
- Use natural oils made for burning, like paraffin or vegetable oil.
- Do not burn scented oils not meant for lamps.
- Keep the lamp area ventilated to remove any odors.
Credit: diyjoy.com
Frequently Asked Questions
How Do I Make An Oil Lamp At Home Safely?
To make an oil lamp safely, use a stable container and cotton wick. Avoid flammable materials nearby and never leave the lamp unattended while lit. Ensure proper ventilation to prevent smoke buildup and always use suitable lamp oil for clean burning.
What Materials Are Needed To Make An Oil Lamp?
You need a small glass or metal container, cotton wick, and lamp oil like vegetable or olive oil. Optional items include a metal holder for the wick and decorative elements. These materials are easy to find and inexpensive.
Can I Use Any Oil For A Homemade Lamp?
Not all oils are suitable. Vegetable, olive, or lamp oil burns cleanly and safely. Avoid using motor oil or any flammable liquids not meant for lamps, as they can produce toxic fumes or cause fire hazards.
How Long Does A Homemade Oil Lamp Burn?
Burn time depends on the oil amount and wick size. Typically, a small oil lamp burns for 4 to 6 hours continuously. Refill the oil before it runs out to maintain a steady flame.
Conclusion
Making an oil lamp at home is simple and fun. You need just a few items and some care. This small project can light up your space nicely. It also helps you understand how lamps work. Try it yourself and enjoy the warm glow.
Safety is important, so keep an eye on the lamp. Share this idea with friends or family. Handmade lamps add charm and a personal touch. Keep practicing, and you might create even better designs soon. Simple steps lead to bright moments.