
Are you ready to transform your bathroom without spending a fortune? Assembling your own bathroom vanity might seem tricky, but with the right steps, you can do it yourself and enjoy a fresh, stylish space.
Imagine the satisfaction of seeing your new vanity perfectly in place, knowing you built it with your own hands. In this guide, you’ll find simple, clear instructions that make the process easy and even enjoyable. Keep reading, and by the end, you’ll have the confidence to tackle your bathroom upgrade like a pro.
Choosing The Right Vanity
Picking the right bathroom vanity is important for both function and style. It helps make your space useful and looks nice.
Think about your room’s size, storage needs, and design tastes before buying a vanity.
Size And Space Considerations
Measure the space where you want to place the vanity. Check the width, height, and depth carefully.
- Allow room for doors and drawers to open fully
- Keep enough walking space around the vanity
- Consider the height that fits your comfort
- Think about plumbing and electrical access
Material And Style Options
Bathroom vanities come in many materials and styles. Choose one that fits your bathroom’s look and lasts long.
| Material | Pros | Cons |
| Solid Wood | Durable, classic look | Can swell in humidity |
| MDF | Cost-effective, smooth finish | Less durable with water |
| Metal | Modern, sturdy | Can rust if not treated |
| Laminate | Variety of colors, easy to clean | Can peel or chip |
Gathering Necessary Tools
To build a bathroom vanity, you need the right tools. This will make your work easier and faster.
Prepare all tools before you start to avoid delays. Safety is also important during assembly.
Basic Tools Required
These tools help you assemble the vanity parts correctly. Having them ready saves time and effort.
- Screwdriver set (flathead and Phillips)
- Power drill with drill bits
- Measuring tape
- Level tool
- Adjustable wrench
- Hammer
- Clamps
- Pencil for marking
Safety Equipment Checklist
Wear safety gear to protect yourself during the assembly. Safety helps prevent injuries.
| Safety Item | Purpose |
| Safety glasses | Protect eyes from dust and debris |
| Work gloves | Protect hands from splinters and sharp edges |
| Dust mask | Prevent inhaling sawdust |
| Ear protection | Reduce noise from power tools |
| Closed-toe shoes | Protect feet from falling tools or parts |
Preparing The Area
Before assembling your bathroom vanity, prepare the area carefully. A clean, organized space helps you work safely and efficiently.
Taking time to measure and clear the workspace prevents mistakes during assembly and installation.
Clearing The Workspace
Remove all items around the installation spot. This includes toiletries, towels, and cleaning supplies.
- Clear the floor and countertops.
- Ensure good lighting for visibility.
- Keep tools and parts nearby but organized.
- Protect floors with a drop cloth or old blanket.
- Ventilate the room if you will use adhesives or sealants.
Ensuring Proper Measurements
Measure the space where the vanity will fit. Check width, depth, and height carefully.
| Measurement | Recommended Check |
| Width | Measure wall to wall or between cabinets |
| Depth | Measure from wall to front edge of vanity |
| Height | Measure floor to desired countertop height |
| Plumbing | Note location of water lines and drain pipes |
Double-check all measurements before starting assembly. This prevents fitting problems later.

Credit: www.familyhandyman.com
Step-by-step Assembly
Assembling a bathroom vanity can be simple with clear instructions. Follow each part carefully to build a sturdy and functional unit.
This guide breaks down the process into three main parts. Each section shows how to complete one key step.
Building The Vanity Frame
Start by assembling the main frame of the vanity. This frame supports the sink and storage areas.
- Lay out all the frame pieces on a flat surface.
- Attach the side panels to the bottom panel using screws.
- Secure the back panel to the sides with nails or screws.
- Check the corners to ensure the frame is square.
- Tighten all fasteners for a solid frame.
Installing The Sink Basin
Next, place the sink basin into the top of the vanity frame. It must fit securely and seal tightly.
| Task | Details |
| Measure opening | Ensure the sink fits the vanity top opening. |
| Apply sealant | Use waterproof sealant around the basin edge. |
| Set basin | Place the sink into the opening firmly. |
| Secure basin | Attach mounting clips under the vanity top. |
| Clean excess sealant | Wipe off any sealant overflow with a cloth. |
Attaching The Faucet
Finally, install the faucet on the sink basin. Correct attachment prevents leaks and allows water flow.
- Insert faucet through the holes on the sink.
- Secure faucet with nuts from underneath the basin.
- Connect water supply lines to the faucet valves.
- Turn on the water and check for leaks.
- Tighten connections if needed.
Securing The Vanity
Securing your bathroom vanity is important for safety and stability. It keeps the vanity from moving or tipping over.
This guide focuses on anchoring the vanity to the wall and leveling the unit for a perfect fit.
Anchoring To The Wall
Anchoring the vanity to the wall prevents it from shifting. Use strong anchors or screws that match your wall type.
Find the wall studs using a stud finder. Mark the spots to drill pilot holes for the screws.
- Use a drill to make pilot holes in the vanity and wall studs
- Insert screws through the vanity’s back panel into the studs
- Tighten screws until the vanity is firmly attached
- Check for any movement and adjust as needed
Leveling The Unit
Leveling the vanity ensures that doors and drawers open smoothly. Use a level tool to check the top surface.
Adjust the feet or add shims under the vanity base to fix any tilt or unevenness.
- Place a level on top of the vanity
- Check front-to-back and side-to-side alignment
- Adjust the vanity feet by turning them clockwise or counterclockwise
- Add wooden shims under the base if feet are not adjustable
- Re-check the level and secure shims with glue or small nails

Credit: www.youtube.com
Connecting Plumbing
Connecting plumbing is a key part of assembling your bathroom vanity. It ensures water flows properly to and from your sink.
Take your time to connect pipes and supply lines carefully. This will help avoid leaks and water damage later.
Attaching Water Supply Lines
Start by turning off the main water supply. This stops water from flowing while you work on the lines.
- Connect the supply lines to the faucet valves using flexible hoses.
- Use plumber’s tape on threads to prevent leaks.
- Hand-tighten the connections, then use a wrench for a snug fit.
- Make sure hot and cold lines are attached to the correct valves.
- Turn the water back on slowly and check for leaks.
Installing The Drain Pipe
Fit the drain pipe under the sink to connect to the home’s plumbing. The pipe removes wastewater safely.
| Part | Purpose | Tip |
| Drain Tailpiece | Connects sink drain to pipe | Use plumber’s putty for a tight seal |
| P-Trap | Prevents sewer gases from entering the room | Align properly to avoid leaks |
| Slip Nuts | Secure pipe sections together | Hand-tighten, then tighten slightly with a wrench |
Final Touches
After assembling your bathroom vanity, some final steps help complete the look. These touches improve durability and style.
Taking time with these details ensures your vanity looks great and lasts longer.
Sealing Edges And Joints
Sealing edges and joints keeps water from damaging the vanity. Use a waterproof sealant made for bathrooms.
Apply the sealant carefully along all seams and edges. Smooth it out for a clean finish.
- Clean the area before applying sealant
- Use painter’s tape for neat lines
- Allow sealant to dry fully
- Check for any gaps and reapply if needed
Adding Handles And Accessories
Handles add function and style to your vanity. Choose handles that match your bathroom’s theme.
Install handles firmly using the screws provided. Tighten carefully to avoid damage.
- Measure handle placement before drilling
- Use a level to keep handles straight
- Add towel bars or hooks nearby if needed
- Clean any fingerprints after installation
Troubleshooting Common Issues
Assembling a bathroom vanity can be tricky. Some problems often happen during the process.
Knowing how to fix these issues saves time and frustration.
Dealing With Leaks
Leaks are common around the sink and pipes. They can cause water damage if not fixed quickly.
Check all pipe connections for tightness. Use plumber’s tape to seal threads properly.
- Inspect the drain pipe and water supply lines
- Tighten loose fittings by hand or with a wrench
- Replace worn-out washers or seals
- Apply plumber’s tape on threaded connections
- Run water and watch for drips before finishing assembly
Correcting Misalignments
Misalignments make the vanity look uneven or cause doors to not close right.
Check that all parts are square and level. Adjust screws or reposition parts as needed.
- Use a level tool on the vanity top and cabinet
- Loosen screws and shift parts slightly to align edges
- Tighten screws after parts are properly aligned
- Adjust door hinges to fix gaps or sticking doors
- Ensure the vanity sits flat on the floor or wall mounts
Maintenance Tips
Keeping your bathroom vanity in good shape is important. Regular care makes it last longer.
Simple maintenance helps avoid big problems and keeps the vanity looking nice.
Cleaning And Care
Clean your vanity often to stop dirt and grime buildup. Use soft cloths and mild cleaners.
Avoid harsh chemicals that can damage the finish. Wipe spills quickly to prevent stains.
- Use a damp cloth for daily cleaning
- Dry surfaces to stop water damage
- Use gentle cleaners, not abrasive ones
- Clean mirrors and hardware regularly
- Protect wood with polish or wax if needed
Periodic Checks And Repairs
Check your vanity often for loose parts or water leaks. Fix problems early to avoid damage.
Tighten screws and handles if they become loose. Look under the sink for leaks or mold.
- Inspect cabinet doors and hinges
- Check faucet and pipes for leaks
- Tighten loose screws and fittings
- Replace damaged parts quickly
- Look for signs of water damage or mold
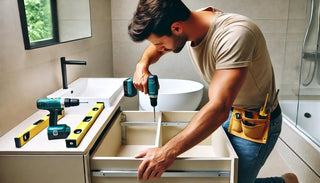
Credit: goldenelitedeco.com
Frequently Asked Questions
How Do I Prepare Before Assembling A Bathroom Vanity?
Start by reading the assembly instructions carefully. Gather all tools and parts needed. Clear the workspace and measure the area to ensure a proper fit. This preparation saves time and prevents mistakes during assembly.
What Tools Are Essential For Bathroom Vanity Assembly?
You will typically need a screwdriver, drill, level, measuring tape, and wrench. A rubber mallet can help with gentle adjustments. Having these tools ready makes the process smoother and quicker.
How Long Does It Take To Assemble A Bathroom Vanity?
Assembly time varies but usually takes 1 to 3 hours. It depends on your experience and the vanity’s complexity. Taking your time ensures a secure and professional finish.
How Do I Install The Vanity Countertop Correctly?
Place the countertop carefully on the vanity base. Align it with the edges and secure it using the provided clips or adhesive. Ensure it is level before final fastening to avoid leaks or damage.
Conclusion
Assembling a bathroom vanity can seem tough at first. Take your time and follow each step carefully. Use the right tools and check parts before starting. Small efforts bring great results. Enjoy your new vanity and the fresh look it adds.
Keep this guide handy for future projects. Simple tasks like this build your confidence. You’ve got this!