
Have you noticed dark spots or cloudy patches ruining your bathroom mirror? That’s mirror desilvering—a common problem that makes your mirror look old and damaged.
But don’t worry, you don’t have to replace the entire mirror to fix it. You’ll learn simple and effective ways to repair mirror desilvering, saving your mirror and your money. Keep reading to discover easy steps you can take right now to bring back your mirror’s shine and clarity.
Causes Of Mirror Desilvering
Mirror desilvering happens when the reflective backing of a mirror breaks down. This causes dark spots or cloudy areas on the mirror surface.
Understanding what causes desilvering can help you prevent it and know how to fix it when needed.
Moisture And Humidity
Bathroom mirrors face constant moisture from showers and baths. High humidity can seep behind the mirror and damage the silver backing.
Over time, this moisture eats away at the reflective layer, causing the mirror to lose its shine.
Cleaning With Harsh Chemicals
Some cleaners contain acids or ammonia that harm the mirror’s backing. Using these can speed up desilvering.
Always use gentle, non-abrasive cleaners and soft cloths to protect the mirror surface.
Poor Mirror Installation
Improper installation can expose the edges of a mirror to air and moisture. This exposure damages the silver backing over time.
Sealing the edges properly helps prevent desilvering and extends the mirror’s life.
Age And Wear
All mirrors age naturally. The silver backing can degrade slowly due to time and use.
Older mirrors often show signs of desilvering even without moisture or chemicals.
Credit: mirrormate.com
Essential Tools And Materials
Mirror desilvering happens when the backing of a mirror starts to fade or peel. Fixing it requires some special tools and materials. Having these ready makes the repair easier and cleaner.
This guide lists the key items you will need to repair bathroom mirror desilvering. Each tool or material plays an important role in the process.
Protective Gloves
Wear protective gloves to keep your hands safe. Gloves stop chemicals and sharp edges from hurting your skin. Use disposable or rubber gloves for best results.
Safety Glasses
Safety glasses protect your eyes from glass shards and chemicals. Always wear them during the repair to avoid injury. Choose glasses that fit well and cover your eyes fully.
Cleaning Solution
A cleaning solution removes dirt and grime from the mirror surface. Use a mild cleaner or rubbing alcohol. Clean the mirror before you start the repair for better adhesion.
Cotton Cloth Or Pads
Use cotton cloth or pads to apply cleaning solution and wipe the mirror dry. They are soft and do not scratch the glass. Keep several cloths ready to use during cleaning and repair.
Mirror Repair Kit Or Silver Repair Paint
Mirror repair kits or silver repair paint help fix the desilvered area. These kits usually include special paint and tools to apply it. Choose a product made for mirror repairs to get the best results.
Fine Paintbrush Or Applicator
A fine paintbrush or applicator helps spread the repair paint evenly. It allows you to control the paint to cover only the damaged parts. Use a brush with soft bristles for smooth application.
Masking Tape
Masking tape protects areas around the repair site. It keeps paint from spreading to clean parts of the mirror. Apply tape carefully to create clean repair edges.
Fine Sandpaper
Fine sandpaper smooths rough edges around the desilvered spots. Use light sanding to avoid scratching the glass. Sandpaper helps paint stick better to the mirror surface.
Preparing The Workspace
Fixing mirror desilvering needs a clean and safe workspace. This helps you work well and avoid damage.
Gather all tools and clear the area before starting. This saves time and keeps everything organized.
Clear The Area Around The Mirror
Remove items from the sink, shelves, and countertop near the mirror. This prevents accidents and gives you space.
Make sure nothing can fall or get damaged while you work on the mirror.
Protect Surrounding Surfaces
Cover the sink, countertop, and floor with a plastic sheet or old towels. This stops chemicals and debris from causing harm.
- Use painter’s tape to keep covers in place
- Make sure covers reach edges to catch spills
- Protect electrical outlets near the mirror
Gather Necessary Tools And Materials
Have all repair tools ready before you start. This includes gloves, cleaning cloths, and repair kits.
- Safety gloves to protect your hands
- Soft cloths for cleaning the mirror
- Mirror repair kit for desilvering
- Masking tape for marking areas
Ensure Good Lighting And Ventilation
Work in a well-lit bathroom or add extra lights. Good light helps you see the desilvered spots clearly.
Open windows or use a fan to keep fresh air. Some repair materials give off fumes that need ventilation.
Cleaning The Mirror Surface
Cleaning the mirror surface is the first step in fixing desilvering. Dirt and grime can hide damage and make repairs harder.
Use gentle cleaning methods to avoid making the mirror worse. This helps you see the affected areas clearly.
Gather Cleaning Supplies
Prepare the right tools before you start cleaning. This saves time and protects your mirror.
- Soft microfiber cloth
- Mild glass cleaner or diluted dish soap
- Spray bottle with water
- Cotton swabs for edges
- Paper towels or lint-free cloth
Clean The Mirror Gently
Spray the cleaner lightly on the cloth, not directly on the mirror. Wipe the surface using soft, circular motions.
Pay special attention to corners and edges using cotton swabs. Avoid harsh scrubbing to prevent scratches.
Check For Remaining Spots
| Spot Type | Cleaning Tip |
|---|---|
| Water Spots | Use vinegar diluted with water to dissolve mineral deposits. |
| Grease or Fingerprints | Apply mild soap solution and gently rub with cloth. |
| Dust and Dirt | Use dry microfiber cloth before wet cleaning. |
Inspect the mirror for spots that need extra cleaning. Treat these areas carefully to avoid damage.
Applying Silvering Solution
Mirror desilvering happens when the reflective backing of a mirror breaks down. You can fix this by applying a silvering solution to restore reflectivity. This process takes patience and care.
Using the right materials and mixing the solution properly is important. Follow clear steps to get good results and make your mirror look better.
Choosing The Right Silvering Kit
Pick a silvering kit designed for bathroom mirrors. Kits vary in quality and ease of use. Some include all parts needed for the repair.
Look for kits with clear instructions and safe chemicals. Kits with a good reputation help avoid mistakes during the repair.
- Choose kits made for small or large mirrors
- Select kits with non-toxic ingredients if possible
- Check if the kit includes protective gloves and tools
- Read reviews about ease of use and results
Mixing And Applying The Solution
Follow the kit instructions to mix the silvering solution carefully. Use clean containers and measure chemicals accurately. Mixing well avoids uneven coating.
Apply the solution in a thin, even layer. Use a soft brush or applicator from the kit. Work in a well-ventilated area and avoid spills.
- Wear gloves and protect your workspace
- Mix chemicals in the order the instructions say
- Apply the solution smoothly without overloading
- Let the solution dry completely before adding more layers
- Repeat application if the mirror needs stronger reflectivity
Sealing The Repaired Area
Sealing the repaired area on a bathroom mirror stops moisture from causing more damage. It keeps the mirror looking clear and stops the silver backing from peeling again.
Use the right sealant and apply it carefully to get the best results. This step protects your repair and extends your mirror’s life.
Selecting A Suitable Sealant
Choose a sealant that works well with glass and bathroom conditions. The sealant should resist water and humidity to protect the mirror.
Look for sealants that dry clear and stay flexible. This helps the seal last longer without cracking or peeling.
- Silicone sealant is water-resistant and flexible
- Clear epoxy can provide a strong, durable seal
- Acrylic sealants dry clear but may be less flexible
- Avoid sealants with strong odors or toxic chemicals
Techniques For Effective Sealing
Clean the mirror surface before sealing. Remove dust and old adhesive to help the sealant stick well.
Apply the sealant in a thin, even line along the edges of the repair. Avoid thick layers that take longer to dry.
- Use a small brush or applicator for control
- Press the sealant gently into cracks and gaps
- Smooth the sealant with a damp finger or tool
- Let the sealant dry fully before using the mirror
Preventive Measures For Future
Mirror desilvering happens when the reflective backing of a mirror breaks down. This often occurs in bathroom mirrors because of moisture and cleaning habits. Taking preventive steps can help keep your mirror clear and shiny for a long time.
Here are some key ways to protect your bathroom mirror from desilvering in the future. Follow these tips to maintain your mirror’s quality and avoid costly repairs.
Control Moisture Levels
High humidity causes damage to the mirror’s silver backing. Use ventilation fans or open windows during and after showers. This helps dry the air quickly and reduces moisture buildup on the mirror.
Use Gentle Cleaning Methods
Avoid harsh chemicals and abrasive materials that can wear down the mirror surface. Instead, clean with a soft cloth and mild soap solution. Wipe gently to prevent scratching or peeling of the silver layer.
- Use microfiber cloths for cleaning
- Choose gentle, non-abrasive cleaners
- Dry the mirror after cleaning to avoid water spots
- Avoid spraying cleaner directly onto the mirror
Seal The Edges Properly
Water can seep into the edges of the mirror and cause desilvering. Apply a clear sealant or mirror edge tape to protect the border. This blocks moisture from reaching the reflective backing.
Choose Quality Mirrors
Good quality mirrors have better protective coatings that resist moisture damage. When buying a new mirror, check for features like anti-fog coating and sealed backing. These add extra protection against desilvering.
| Mirror Feature | Benefit |
| Anti-fog coating | Prevents moisture buildup on surface |
| Sealed backing | Blocks water from reaching silver layer |
| Thick glass | Provides extra durability |
| Corrosion-resistant silver | Lasts longer without damage |
Avoid Direct Water Contact
Try not to splash water directly on the mirror. Keep shower spray and sink water away. Direct water contact speeds up the breakdown of the silver backing.
Tip:Installing a mirror cabinet or placing the mirror slightly away from water sources can help reduce water exposure.

Credit: bfymirror.com
Common Mistakes To Avoid
Fixing mirror desilvering can be tricky. Many people make errors that worsen the damage. Knowing what to avoid can save time and money.
This guide highlights common mistakes to help you repair your bathroom mirror safely and effectively.
Using The Wrong Materials
Choosing incorrect products harms the mirror surface. Avoid using harsh chemicals or paints not made for glass.
Skipping Surface Preparation
Not cleaning or sanding the affected area results in poor adhesion. Always prepare the surface before applying repair solutions.
Applying Too Much Repair Compound
Using excess compound causes bubbles and uneven finishes. Apply thin, even layers for best results.
Ignoring Safety Precautions
Not wearing gloves or eye protection can cause injuries. Always protect yourself during the repair process.
Rushing The Drying Time
Removing tape or touching the mirror too soon ruins the repair. Wait the full drying time recommended by the product instructions.
Common Repair Mistakes Chart
| Mistake | Why It Happens | Effect on Repair |
| Wrong Materials | Using non-glass products | Damage surface, poor adhesion |
| Skipping Prep | Rushing the job | Repair peels off quickly |
| Too Much Compound | Trying to fix quickly | Bubbles and uneven finish |
| No Safety Gear | Neglecting protection | Risk of injury |
| Rushing Drying | Impatience | Repair fails or smudges |
Alternative Solutions
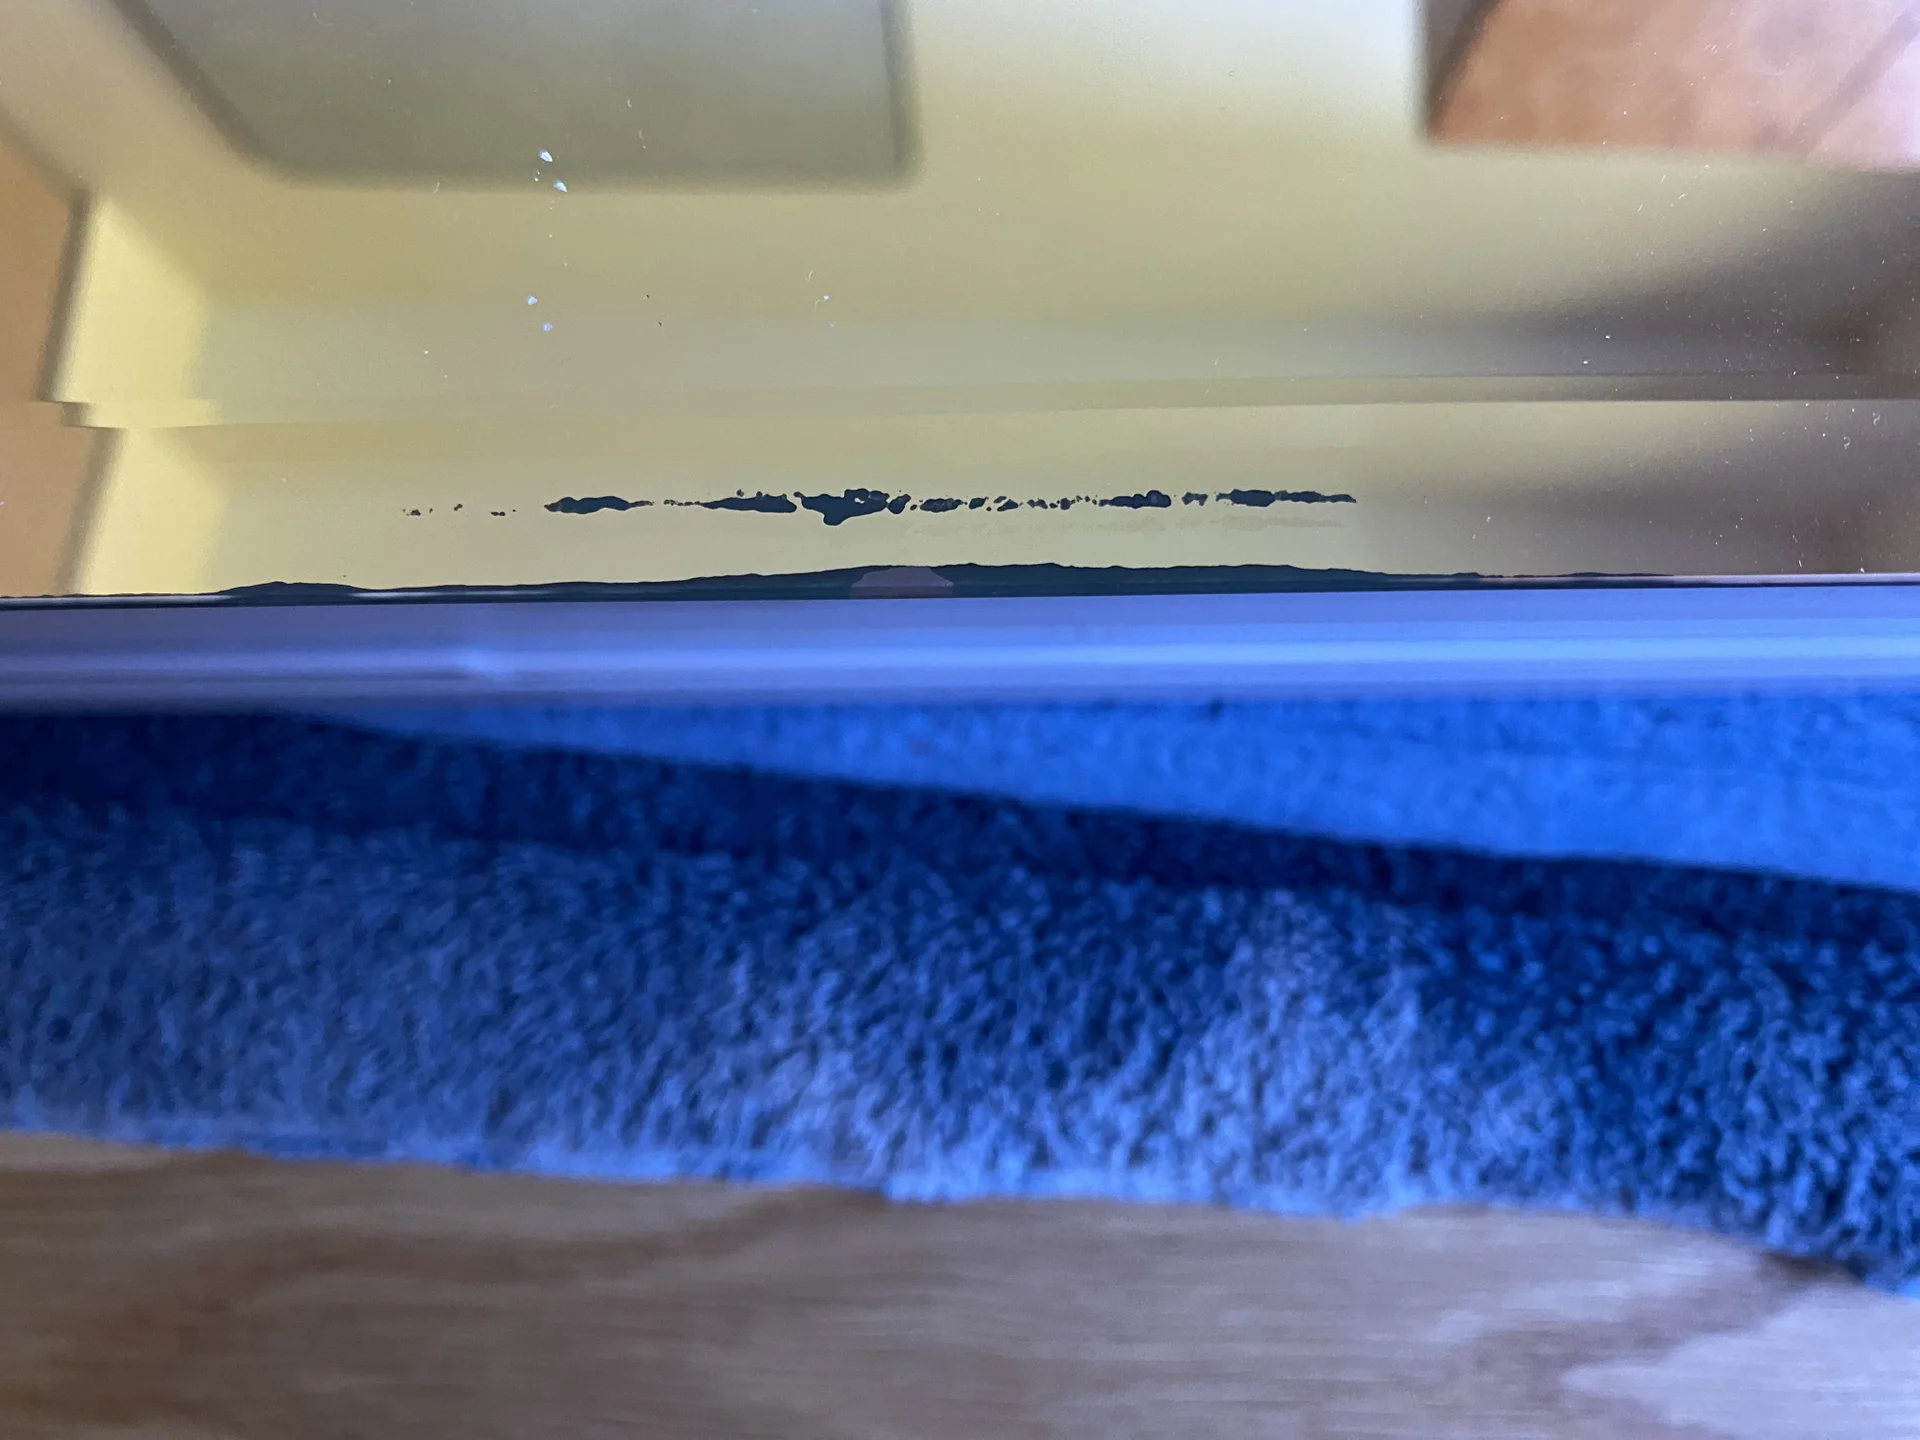
Mirror desilvering happens when the reflective layer behind a mirror breaks down. This can cause black spots or cloudy areas on your bathroom mirror. Fixing this issue may need some simple alternatives.
Two common solutions include using mirror films or replacing the mirror completely. Each method offers a different way to restore your mirror’s look.
Using Mirror Films
Mirror films are thin layers you can apply to the back of your mirror. They help cover damaged areas and protect the mirror from future damage.
- Clean the mirror surface carefully before applying the film.
- Cut the film to fit the size of your mirror.
- Use a squeegee to remove air bubbles during application.
- Allow the film to dry completely for a clear finish.
Mirror films can improve the look of your mirror without replacing it. They are a budget-friendly and quick fix.
Replacing The Mirror
If the damage is severe, replacing the mirror might be best. This restores full clarity and prevents further problems.
| Mirror Replacement Options | Details |
| Buy Pre-cut Mirror | Easy to install, fits standard sizes |
| Custom Cut Mirror | Made to exact measurements, higher cost |
| Professional Installation | Ensures proper fitting and safety |
Credit: bfymirror.com
Frequently Asked Questions
What Causes Mirror Desilvering In Bathrooms?
Mirror desilvering happens due to moisture and cleaning chemicals. Over time, water seeps behind the glass, damaging the reflective silver coating. This leads to dark spots or cloudy areas on the mirror’s surface.
Can I Repair Bathroom Mirror Desilvering Myself?
Yes, minor desilvering spots can be repaired at home using silver repair kits. These kits restore the reflective coating and prevent further damage. For extensive damage, professional replacement might be necessary.
How Do I Prevent Mirror Desilvering In Bathrooms?
To prevent desilvering, keep mirrors dry and well-ventilated. Avoid harsh cleaners and wipe mirrors with a soft cloth. Using a dehumidifier or exhaust fan reduces moisture buildup behind the mirror.
What Materials Are Needed To Fix Mirror Desilvering?
You need a silver repair kit, gloves, a soft cloth, and painter’s tape. These materials help apply the reflective coating precisely and safely, restoring the mirror’s original shine.
Conclusion
Repairing mirror desilvering in your bathroom is simple with the right steps. Clean the mirror surface carefully before applying repair products. Small scratches and spots improve with touch-up kits easily. Protect your mirror by keeping it dry and well-ventilated. Regular care helps prevent future damage.
A clear, shiny mirror brightens your bathroom space. Try these tips to extend your mirror’s life today. Your bathroom will look fresher and more inviting. Keep these easy fixes in mind for lasting results.