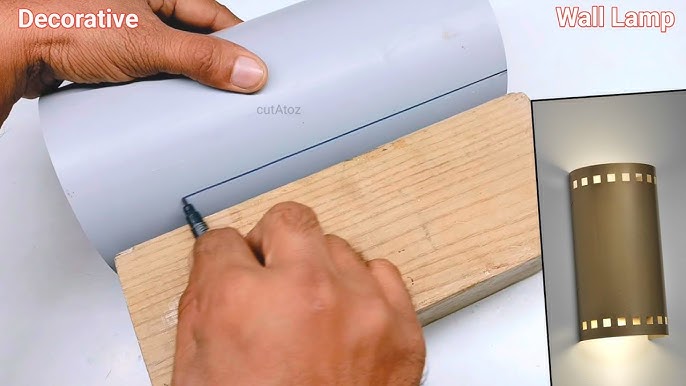
Are you looking to add a bright, energy-saving light to your home without spending a lot? Making an LED lamp at home is easier than you might think.
Imagine creating a stylish, custom lamp that not only lights up your space but also saves you money on electricity. In this guide, you’ll discover simple steps to build your own LED lamp using basic materials. By the end, you’ll have a cool, functional lamp that you made yourself.
Ready to light up your creativity and save money? Let’s get started!

Credit: www.youtube.com
Materials Needed
Making an LED lamp at home is simple and fun. You only need a few basic materials.
Gathering the right materials helps you build a strong and bright lamp.
Led Bulbs
Choose LED bulbs that match the size and brightness you want for your lamp. LEDs use less power and last longer.
Power Source
You need a power source to light the LED bulbs. It can be batteries or a plug-in adapter.
Wires And Connectors
Wires connect the power source to the LED bulbs. Use insulated wires and small connectors for safety.
- Red and black insulated wires
- Wire cutters and strippers
- Small connectors or soldering tools
Lamp Body Materials
The lamp body holds all parts together. You can use wood, plastic, or metal to build it.
| Material | Use |
| Wood | Easy to shape and glue |
| Plastic | Lightweight and durable |
| Metal | Strong and heat resistant |
Additional Tools
You will need some tools to assemble your lamp safely and neatly.
- Screwdriver
- Glue gun or strong adhesive
- Electrical tape
- Safety gloves
Choosing The Right Led
Picking the right LED is key to making a bright and efficient lamp at home.
Understanding LED types and their brightness and colors helps you choose well.
Types Of Leds
There are many LED types used in home lamps. Each type fits different needs.
- Standard LEDs: Small and cost-effective for basic lighting.
- High-Power LEDs: Very bright and used for strong lighting.
- RGB LEDs: Can show many colors by mixing red, green, and blue.
- Filament LEDs: Look like old bulbs but use less energy.
Brightness And Color Options
Brightness and color affect how your lamp looks and feels in a room.
| Feature | Description | Typical Use |
| Brightness (Lumens) | Measures light output | Higher lumens for work lamps |
| Color Temperature (Kelvin) | Warm to cool light shades | Warm for cozy rooms, cool for task lighting |
| Color Rendering Index (CRI) | Shows how natural colors appear | Higher CRI for reading and colors |
Tools Required
To make an LED lamp at home, you need some simple tools. These tools help you build and connect parts safely.
Gathering the right tools before starting will make the process faster and easier.
Soldering Iron
A soldering iron helps you join wires and LED parts together. It heats the solder so it melts and connects metal pieces.
Wire Stripper
This tool removes the plastic cover from wires. It exposes the metal inside for making electrical connections.
Multimeter
A multimeter measures electrical values like voltage, current, and resistance. It helps check if your lamp parts work correctly.
Screwdriver Set
Screwdrivers are needed to open battery holders or fix small screws in the lamp body.
Additional Tools
- Electrical tape to cover exposed wires
- Hot glue gun for fixing parts firmly
- Safety glasses to protect your eyes
- Helping hands tool to hold small parts
Planning Your Design
Planning your LED lamp design is the first step to building it at home. A clear plan helps you avoid mistakes and saves time.
Think about how your lamp will look and fit in your space. This makes building easier and more fun.
Sketching Your Idea
Start by drawing your lamp idea on paper. Sketching helps you see the shape and parts you need.
You can make simple drawings or detailed ones. Include the LED placement and power source in your sketch.
- Draw the lamp’s shape and size
- Mark where the LEDs will go
- Note how you will connect wires
- Plan where the switch will be
Considering Size And Shape
Think about how big or small your lamp should be. The size affects how much light you get and where the lamp fits.
Choose a shape that fits your style and space. A tall lamp works well on desks. A small one suits bedside tables.
- Measure the space where the lamp will go
- Pick a size that fits the area
- Choose a shape that looks nice and holds LEDs well
- Make sure it is easy to build and use
Wiring The Circuit
Wiring the circuit is a key step in making an LED lamp at home. It connects all parts so the lamp works well.
You need to know how to connect wires and parts safely. This keeps the lamp bright and prevents damage.
Understanding Basic Electronics
Basic electronics helps you know how electricity flows in the circuit. It uses parts like wires, batteries, and LEDs.
Electricity moves from the power source to the LED through the wires. You must connect the parts in the right order.
- Power source gives energy (like a battery)
- Wires carry electricity between parts
- LED lights up when electricity passes through it
- Resistors control the current to protect LEDs
Connecting Leds Safely
LEDs need careful wiring to avoid damage. Connect them with resistors to limit the current.
Use the correct wire connections to prevent short circuits. Double-check polarity: LEDs have positive and negative sides.
- Attach resistor in series with each LED
- Connect the LED’s longer leg to positive wire
- Connect the shorter leg to negative wire
- Use insulated wires to avoid accidental shorts
- Test the circuit with a low voltage first
Assembling The Lamp
Assembling your LED lamp is an important part of the project. It brings all parts together to make the lamp work.
Follow simple steps to prepare the base and attach the LEDs carefully. This will ensure your lamp is stable and bright.
Preparing The Lamp Base
Start by choosing a strong and flat base for your lamp. This keeps the lamp steady on any surface.
Clean the base well and mark spots where the LEDs will go. Make sure the spots are spaced evenly for good light spread.
- Use wood, plastic, or metal as the base
- Wipe the surface with a dry cloth
- Measure and mark LED positions with a pencil
- Drill small holes if needed for LED wires
Attaching The Leds
Attach the LEDs to the marked spots on the base. Use glue or screws depending on your base material.
Connect the LED wires carefully. Make sure positive and negative ends match the power source to avoid damage.
- Place each LED in its hole or spot
- Secure LEDs with hot glue or small screws
- Twist or solder wires to connect LEDs
- Check wire connections for correct polarity
Testing Your Lamp
After assembling your LED lamp, testing is essential. It ensures the lamp works safely and correctly.
This guide will help you check your lamp’s function and fix common problems.
Ensuring Proper Functionality
Start by connecting the lamp to a power source. See if the LED lights up without flickering.
- Check the power switch for smooth operation.
- Observe the brightness to confirm it is steady.
- Feel the lamp surface to ensure it does not overheat.
- Listen for unusual sounds like buzzing or humming.
- Verify all connections are secure and tight.
Troubleshooting Common Issues
If your lamp does not work properly, use this table to find common problems and solutions.
| Problem | Possible Cause | Solution |
| LED does not light up | Loose wiring | Check and tighten all wires |
| Light flickers | Power supply issue | Try a different power source |
| Lamp overheats | Poor ventilation | Improve airflow around the lamp |
| Switch does not work | Faulty switch | Replace the switch |
| Buzzing sound | Electrical interference | Use shielded cables |

Credit: www.youtube.com
Decorating And Finishing Touches
Decorating your LED lamp makes it look nice and fit your style. Finishing touches help the lamp last longer and work safely.
Use simple ideas to add beauty and ensure your lamp stands well without any problems.
Adding Aesthetic Elements
Choose colors and materials that match your room. Paint the lamp base or cover it with fabric for a soft look.
Decorate the lampshade with patterns or stickers. Use warm light bulbs for a cozy feeling.
- Paint the base with bright or pastel colors
- Wrap the stand with twine or ribbon
- Add small decorations like beads or buttons
- Use patterned paper or fabric for lampshade
- Choose LED bulbs that give soft or warm light
Ensuring Stability And Safety
Make sure the lamp stands firmly on flat surfaces. Use a heavy base or add weight inside the bottom.
Check all wires and connections to avoid short circuits. Keep the lamp away from water and heat sources.
- Use a wide, heavy base for balance
- Secure all electrical parts tightly
- Cover wires with insulation tape
- Place lamp away from liquids and heat
- Test the lamp before regular use

Credit: www.youtube.com
Frequently Asked Questions
What Materials Do I Need To Make An Led Lamp?
You need LEDs, resistors, wires, a power source, a soldering kit, and a lamp casing. These basics ensure a functional LED lamp.
How Do I Connect Leds In A Lamp Circuit?
Connect LEDs in series or parallel depending on voltage and current requirements. Use resistors to avoid damage.
Can I Use Batteries To Power My Led Lamp?
Yes, batteries are a portable power source. Choose the right voltage and ensure proper battery life.
Is Soldering Necessary For Making An Led Lamp?
Soldering ensures secure electrical connections and durability. Use it to connect wires and components firmly.
Conclusion
Making an LED lamp at home is simple and fun. You only need a few parts and basic tools. This project helps you save money and learn new skills. Try different designs to find what you like best. Enjoy the bright, energy-saving light you create yourself.
Keep experimenting and improve your lamp with time. This small effort brings great results and satisfaction. Start today and see how easy it can be!