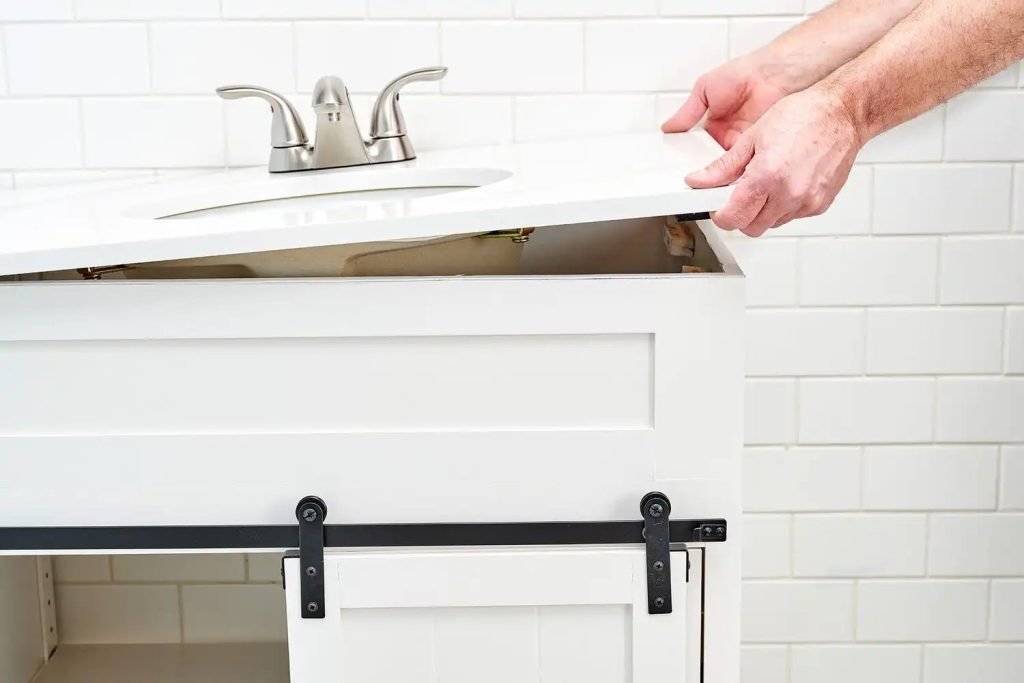
Are you ready to give your bathroom a fresh, stylish look? Installing a bathroom vanity can transform your space, adding both function and charm.
But if you’re worried it might be complicated or time-consuming, don’t be. This guide breaks down every step so you can confidently put in your bathroom vanity yourself. By the end, you’ll not only save money but also enjoy the satisfaction of a job well done.
Keep reading to discover how easy it can be to upgrade your bathroom with a brand-new vanity.
Choose The Right Vanity
Choosing the right bathroom vanity is important for style and function. It should fit your space and match your bathroom’s look.
This guide helps you pick a vanity that fits well and works with your plumbing.
Measure Your Space
Start by measuring the area where the vanity will go. Measure the width, depth, and height carefully.
- Measure the wall width to fit the vanity.
- Check the space from the wall to the door or shower.
- Measure the height to match your comfort level.
- Note any obstacles like windows or outlets.
Select Style And Material
Pick a vanity style that fits your bathroom’s theme. Choose materials that resist water and last long.
| Style | Material | Features |
| Modern | Laminate | Easy to clean, budget-friendly |
| Traditional | Solid Wood | Durable, classic look |
| Rustic | Reclaimed Wood | Unique texture, eco-friendly |
| Contemporary | Metal and Glass | Sleek, stylish |
Check Plumbing Compatibility
Make sure the vanity fits your existing plumbing. Check the sink and drain locations before buying.
- Confirm the size and position of water supply lines.
- Check drain pipe placement and height.
- Choose a vanity with a compatible sink style.
- Consider space for faucets and handles.
Credit: goldenelitedeco.com
Gather Tools And Materials
Installing a bathroom vanity needs careful preparation. You must gather all tools and materials before starting.
Having everything ready helps the work go smoothly and saves time.
Essential Tools List
Using the right tools makes installing your vanity easier. Prepare all tools before you begin.
- Adjustable wrench for tightening bolts
- Screwdriver set for screws
- Power drill with drill bits
- Level to check evenness
- Measuring tape for accurate sizes
- Stud finder to locate wall studs
- Caulking gun for sealing edges
- Pipe wrench for plumbing connections
- Safety glasses for eye protection
Required Installation Materials
You need materials that connect and support the vanity. Gather these items before installation.
- Bathroom vanity cabinet
- Vanity countertop with sink
- Water supply lines
- Drain assembly kit
- Plumber’s tape to prevent leaks
- Silicone caulk for sealing
- Mounting brackets or screws
- Wall anchors if studs are not available
- Wood shims to level the vanity
Prepare The Area
Preparing the bathroom area is important before installing a new vanity. This helps ensure a smooth installation and a lasting finish.
Take time to clear and check the space so the new vanity fits well and the bathroom looks great.
Remove Old Vanity
Start by turning off the water supply to the sink. Then disconnect plumbing carefully. Remove screws or nails holding the old vanity to the wall.
- Turn off water valves under the sink.
- Disconnect water lines and drain pipes.
- Remove screws attaching vanity to wall studs.
- Lift out the old vanity and set aside.
Inspect Walls And Flooring
Check the walls and floor where the vanity sat. Look for water damage, mold, or weak spots. Make sure the floor is level and solid.
| Area | What to Check | Signs of Problem |
| Walls | Water damage, mold, loose drywall | Soft spots, discoloration, peeling paint |
| Flooring | Levelness, water damage, rot | Uneven surface, swelling, soft spots |
Fix Any Damage
Repair damage before placing the new vanity. Replace wet drywall or flooring. Patch holes and sand rough areas. Let repairs dry fully.
- Replace damaged drywall or backer board
- Patch holes with spackle or filler
- Sand patched areas smooth
- Apply primer or sealant to repaired spots
- Ensure floor is dry and level

Credit: www.youtube.com
Install The Vanity Cabinet
Installing the vanity cabinet is a key step in putting in a bathroom vanity. It provides the base for your sink and countertop. This guide helps you place and secure the cabinet properly.
Follow the instructions below to position the cabinet, level it, and attach it to the wall studs for a safe and sturdy installation.
Position The Cabinet
Place the vanity cabinet in the desired location. Check that it fits well between the walls and aligns with plumbing connections. Make sure there is enough space for doors and drawers to open.
- Move the cabinet close to the wall without forcing it.
- Check that the back of the cabinet touches the wall evenly.
- Leave a small gap if the wall is uneven or has pipes.
- Ensure the cabinet is centered under the sink area.
Level And Secure
Use a level to check the cabinet’s position. The cabinet must be flat from front to back and side to side. Adjust with shims if needed. This step prevents problems with the sink and countertop later.
| Check Area | Action | Tool Needed |
| Front edge | Place level and adjust shims | Carpenter’s level, wooden shims |
| Side edges | Check level and add shims if tilted | Carpenter’s level, shims |
| Back edge | Confirm it is flush with wall | Measuring tape |
Attach To Wall Studs
Secure the vanity cabinet by attaching it to the wall studs. This holds the cabinet firmly in place. Use screws long enough to go through the cabinet and into the stud behind the wall.
- Find the wall studs using a stud finder.
- Mark the stud locations on the cabinet frame.
- Pre-drill holes in the cabinet where you marked.
- Drive screws through the cabinet into the studs.
- Check the cabinet is still level after attaching.
Connect Plumbing Fixtures
After placing your bathroom vanity, the next step is to connect the plumbing. Proper plumbing ensures your sink works without leaks or problems.
This section covers installing the faucet and drain, connecting water supply lines, and checking for leaks.
Install Faucet And Drain
Start by installing the faucet on the sink. Follow the instructions that come with your faucet for the best fit.
Next, attach the drain assembly to the sink. Use plumber’s putty or a rubber gasket to seal the drain.
- Place the faucet base on the sink holes
- Tighten mounting nuts from below
- Apply plumber’s putty around drain flange
- Insert drain body and tighten the lock nut
Connect Water Supply Lines
Attach the water supply lines to the faucet’s hot and cold inlets. Use flexible supply tubes for easy connection.
Make sure to screw the supply lines tightly to avoid leaks but do not overtighten and damage the fittings.
- Turn off main water supply first
- Connect hot water line to left faucet inlet
- Connect cold water line to right faucet inlet
- Use adjustable wrench to secure connections
Check For Leaks
Turn on the water supply slowly and check all connections for leaks. Look under the sink and around the faucet.
If you see drips, tighten the connections gently or replace damaged washers or seals.
- Open both hot and cold taps fully
- Inspect faucet base and drain for water
- Check supply line connections
- Fix leaks immediately to prevent damage
Attach The Vanity Top
Attaching the vanity top is a key part of installing your bathroom vanity. It creates a clean, finished look and protects the base from water damage.
Follow these simple steps to secure the countertop properly and avoid common problems.
Apply Sealant
Use a waterproof sealant to prevent water from leaking between the vanity top and base. A silicone sealant works best for this job.
- Clean the edge of the vanity top and the base where they will meet.
- Cut the tip of the sealant tube to the right size for a smooth bead.
- Apply a continuous line of sealant along the top edge of the vanity base.
Align And Secure Countertop
Proper alignment ensures the vanity top fits well and looks good. Secure it to keep it steady and safe.
| Task | Tips |
|---|---|
| Place the vanity top carefully | Center it on the base, check for even edges |
| Check level | Use a level tool to make sure it sits flat |
| Secure with screws or brackets | Attach underneath to hold it firmly in place |
Clean Excess Sealant
Remove extra sealant before it dries to keep the vanity neat. Use a damp cloth for best results.
- Wipe along the edges carefully
- Use a plastic scraper for thick sealant
- Clean tools and hands immediately after use
Final Touches
After installing your bathroom vanity, the last steps ensure it looks great and works well. These final touches help protect the vanity and make it ready for daily use.
Focus on installing hardware, sealing edges, and testing all functions. Each step adds to the durability and appearance of your vanity.
Install Hardware
Attach all knobs, pulls, and handles to the vanity drawers and doors. Use a screwdriver or drill to secure each piece tightly. Make sure the hardware matches the style of your bathroom.
- Align hardware holes with vanity doors and drawers
- Insert screws and tighten evenly
- Check that handles move smoothly without wobbling
- Clean off any fingerprints or dust
Seal Edges With Caulk
Apply caulk along the edges where the vanity meets the wall and countertop. This seals gaps and prevents water damage. Use a caulking gun for an even bead.
| Caulking Tips |
|---|
| Choose a waterproof, mold-resistant caulk |
| Cut the caulk tube tip at a 45-degree angle |
| Apply steady, even pressure while moving the gun |
| Smooth the bead with a wet finger or tool |
| Wipe away excess caulk quickly |
Test Functionality
Check that all drawers and doors open and close easily. Turn on the faucet and inspect for leaks. Confirm that plumbing connections are secure and dry.
- Open and close all drawers and cabinet doors
- Run water from the faucet for several minutes
- Look under the sink for drips or moisture
- Tighten any loose fittings if needed
- Ensure the vanity is stable and not rocking

Credit: acedecorbath.com
Frequently Asked Questions
How Do I Choose The Right Vanity Size?
To choose the right vanity size, measure your bathroom space accurately. Consider the available floor area and plumbing locations. Ensure there’s enough space for opening doors and drawers. A well-sized vanity enhances functionality and aesthetics.
What Tools Are Needed To Install A Bathroom Vanity?
You’ll need basic tools like a drill, level, screwdriver, and wrench. Additionally, have a caulk gun, measuring tape, and plumber’s tape handy. Ensure you have appropriate safety gear. These tools will help you install the vanity securely and efficiently.
How Do I Secure A Vanity To The Wall?
To secure a vanity, locate wall studs using a stud finder. Drill pilot holes into the studs. Use screws to attach the vanity securely. Ensure the vanity is level before tightening screws. This provides stability and prevents movement.
Can I Install A Vanity Myself?
Yes, you can install a vanity yourself with basic DIY skills. Follow the manufacturer’s instructions carefully. Ensure you have the necessary tools and materials. If you’re unsure, consider hiring a professional for a seamless installation.
Conclusion
Installing a bathroom vanity can improve your space quickly. Follow each step carefully for the best results. Take your time and double-check your work. A sturdy vanity adds style and function to your bathroom. Keep tools and materials close during the process.
Enjoy the fresh, new look you created yourself. Small projects like this boost your home’s value. Remember, safety first—turn off water and use tools safely. Soon, you will have a neat and useful bathroom vanity. Simple tasks done well make a big difference.